Gastrointestinal Radiology > Procedures > CT-Guided Perc. Gastrostomy > CT-Guided Perc. Gastrostomy (4)
CT-Guided Percutaneous Gastrostomy: A Tutorial
![]()
Step 3: After gastric inflation, initial planning axial CT slices are acquired. Place a secure radiopaque marker on the abdominal wall before image acquisition. Choose a puncture location based on the proximity of the stomach to the anterior abdominal wall, lack of intervening structures (e.g., colon, liver, and vessels), and patient comfort considerations. Use lung windows to aid detection of the stomach and colon. The ideal puncture site is at the junction of the anterior left rib cage and the lateral border of the rectus abdominis muscle. Mark the puncture location in indelible ink.
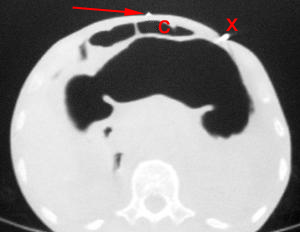
Plan the entrance site (x) by reference to the lead marker (arrow), lateral to the colon (c).
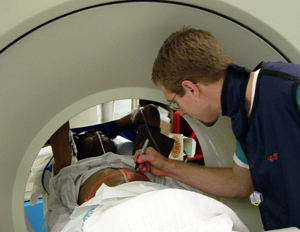
Marking the puncture site on the skin.
Step 4: Prep and drape the patient using standard aseptic technique. A wide skin prep is helpful in case the stomach or gastrointestinal contents move and a new puncture location is necessary.
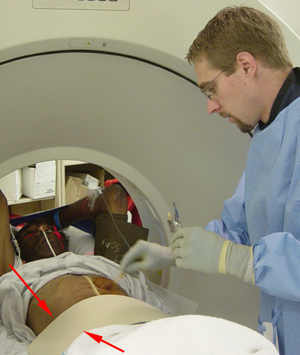
Prepping the patient. Note the lead shield (arrows) over patient's lower abdomen below the gastrostomy site to reduce scattered radiation to the operator
Step 5: Administer copius local anesthesia subcutaneously at the puncture site using a 25-gauge needle and lidocaine. Anesthetize the peritoneum and gastric wall, if possible.
![]()
![]()